Our Location
5th Floor, Huake Center, Lanshan District, Linyi City, Shandong Province, China

5th Floor, Huake Center, Lanshan District, Linyi City, Shandong Province, China
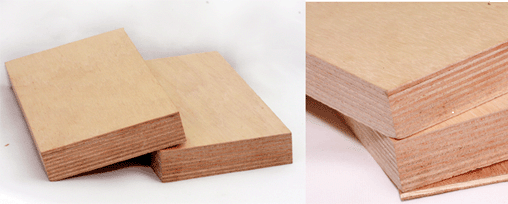
Plywood v groove describes a panel face milled with a series of V-shaped channels that run in one direction, giving the sheet the look of individual boards without the joints of real planks. The groove creates a shadow line that reads as separate boards, so a plain panel becomes a finished, textured surface for walls, ceilings, and cabinets.
Makers choose a plywood v groove panel when they want the board look with the stability and the large-format supply of plywood, and the profile, the spacing, and the grade decide how the finished surface performs.
A v-groove panel starts as a standard sheet, and a router or a mill cuts shallow V channels across the face at a set spacing. The groove only cuts into the face veneer, so the panel keeps its cross-laminated core and its strength while gaining the appearance of separate boards.
The bevel on each side of the groove forms a shallow V that catches light and shadow, which is what makes the line read so strongly. The depth and the width of the V set how pronounced the shadow appears across the surface.
Some panels arrive factory-grooved with a consistent profile, while others are grooved on site for a custom spacing. The factory version gives repeatable lines and a fast installation, and the site version gives control over the layout to match a room or a cabinet front.
A V groove is one of several decorative profiles. A bead groove leaves a rounded reed between channels, a nickel gap leaves a square reveal, and a flush joint leaves the face smooth. Each profile changes the shadow and the period feel of the surface.
The V groove suits a rustic or a classic look, while a bead or a nickel gap leans toward a cottage or a shaker style. The profile choice is a design decision as much as a technical one, so the maker picks it with the room in mind.
Groove spacing sets the scale of the board look. A narrow spacing of 100 mm reads as a fine, busy pattern, while a wide spacing of 200 mm or more reads as broad boards. The room size and the ceiling height guide the choice.
The panel type follows the location. An interior wall or ceiling takes a standard panel, while a damp room or a cabinet front may want a moisture-resistant or a pre-finished face. The groove does not change the panel’s core, so the buyer still selects the grade by the site.
Thickness follows the support. A thin panel needs a solid backing or a tight batten layout, while a thicker panel spans wider supports and stays flat across a ceiling. The grooving removes a little face strength, so the panel should not be thinned below the duty allows.
A smooth, tight face takes a clean groove with little tearout, while a coarse face chips at the cut. Choosing a panel with a sound face veneer and a stable core gives the cleanest lines and the best shadow.
For a painted finish, a panel that takes paint evenly hides the small variations in the face. For a clear finish, a face with a consistent grain pattern keeps the grooved surface looking intentional rather than patchy.
The grooved face suits feature walls, ceilings, wainscoting, cabinet doors, and shop fit-outs. Anywhere a board look adds texture without the cost and the movement of solid planks, the v-groove panel fits.
On walls, the grooves can run vertically for height or horizontally for width, and the direction changes the way the room reads. On ceilings, the grooves usually run in one direction to lead the eye along the space.
On cabinet fronts, a v-groove panel gives a framed, furniture look without individual door frames. The grooves align across the run of doors, so the cabinet reads as one piece with a continuous pattern.
A feature wall benefits from a panel that runs floor to ceiling in one piece, which avoids horizontal joints and keeps the groove pattern unbroken. Cutting the panel to the wall height keeps the lines clean and the install fast.
A ceiling panel wants support at close centers so the grooves stay straight and the sheet does not sag. A cabinet front wants careful alignment so the grooves meet across doors and drawers, and it also wants the carcass to stay square so the pattern holds.
A shop fit-out often mixes the grooved panel with plain trim, so the maker plans the groove runs to land behind counters and shelving where the lines can change without disrupting the pattern.
On-site grooving uses a router with a V-bit and a straightedge, cutting each channel in one steady pass. A sharp bit and a consistent speed leave clean shoulders and a smooth bevel, while a dull bit or a slow feed burns the face and chips the edges.
Cut the panel to size before grooving when the layout allows, so the grooves land where the design wants them. Measure the spacing from a fixed edge and mark every line, because a drifting groove is the first thing the eye catches.
Finishing follows the profile. Paint fills the groove with colour and softens the shadow, while a stain or clear coat keeps the raw timber look and deepens the contrast in each V. Sand the face lightly and clear the dust from the channels before coating.
Tearout happens where the bit lifts the face veneer, and it shows most at the panel edges and across a coarse grain. A backing board, a slower feed, or a scoring pass reduces the chip and keeps the line crisp.
Burn marks come from a dull bit or from pausing in the cut. Keep the router moving, use a sharp bit, and take a light pass to avoid the scorch that no finish will hide.
Buying starts with the profile, the spacing, and the panel grade. Confirm the groove spacing, the depth, and the face grade on the order, and check that the panel is flat and square so the lines stay true once fixed.
Installation follows the support. Wall panels fix to battens or directly to the frame, ceiling panels fix to close battens, and cabinet fronts fix to the carcass with the grooves aligned. A consistent fixing keeps the panel flat and the pattern even.
Plan the layout so the grooves fall symmetrically across the surface. Setting the pattern from the room’s center or from a focal point makes the finished wall look deliberate, not cut off at one end.
Store the panels flat and dry, because a grooved sheet warps just like a plain one and a warped panel shows every line out of true. Let the panels acclimatise to the room before fixing so they settle flat.
Handle the grooved face with care on site, since a knocked corner lifts the veneer along a channel and breaks the pattern. Keep the sheets on edge against a wall in short spells and flat for longer storage.
The panel sets the quality of the groove. Commercial Plywood gives a sound face that takes a clean V cut for walls and ceilings, while Film Faced Plywood suits a hard-wearing grooved surface in a utility area. Melamine Plywood brings a pre-finished face for cabinet fronts, MDF Board machines a very smooth groove for painted panelling, and Chip Board covers the budget tier for a covered interior face.
Suppliers such as HYY list the grade and the thickness on the contract, so the buyer can order a panel whose face carries the groove cleanly and stays flat on the wall.
What is v-groove plywood? It is a plywood panel with V-shaped channels cut across the face to imitate the look of separate boards while keeping the panel’s strength and stability.
Can you groove plywood yourself? Yes, with a router and a V-bit guided by a straightedge. A sharp bit and a steady feed give clean lines with little tearout.
How deep should a v-groove be? The groove usually cuts only the face veneer, deep enough to form a shadow but shallow enough to keep the panel’s strength.
What is the best plywood for v-groove panelling? A panel with a sound, tight face veneer grooves cleanly, and a moisture-resistant grade suits a damp room.
Can v-groove plywood be painted? Yes. Paint fills the grooves and softens the shadow, while a stain or clear coat keeps the timber look and deepens the contrast.