Our Location
5th Floor, Huake Center, Lanshan District, Linyi City, Shandong Province, China

5th Floor, Huake Center, Lanshan District, Linyi City, Shandong Province, China
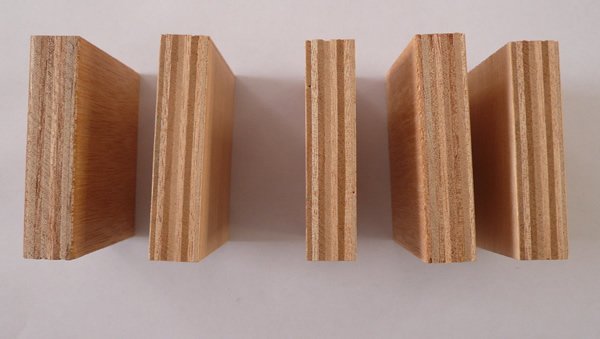
Plywood yard art covers the painted cutouts, seasonal displays, and garden figures that makers build from a single panel and a jigsaw. The plywood is flat, light, and cheap, so it shapes into letters, animals, and scenes that a solid board would make heavy and costly.
Yard art lives outdoors, so the panel grade and the sealing decide whether a display lasts a season or years. A maker who picks an exterior grade and seals every edge keeps the art bright through the rain and the sun.
Yard art is any decorative piece cut from plywood and displayed outside, from a simple painted sign to a full seasonal scene. The panel takes paint, stands up to outdoor mounting, and shapes into almost any outline the maker can draw.
The flat panel suits stencilling and lettering, so a sign or a name board cuts cleanly and paints evenly. The same flatness lets a maker stack cutouts to build a layered scene with depth.
Plywood is also light enough to move and hang. A large cutout stays manageable for one person, which matters when the display goes up and comes down with the seasons.
Plywood offers a large, flat, affordable surface that takes paint and stands up to mounting. It cuts fast with a jigsaw, and it holds shape without the weight of solid timber.
The maker can also use offcuts from other projects, which keeps the cost low for a display that may only show for a few weeks each year.
The panel must resist the weather. An exterior or a moisture-resistant grade keeps its bond when the rain and the damp reach it, while an interior grade delaminates and loses the layers that make the panel strong.
Thickness follows the size and the exposure. A small cutout takes a thinner panel, while a large freestanding figure needs a thicker sheet or a braced back to stay stiff and upright in the wind.
The face follows the finish. A smooth face takes paint and stencil lines cleanly, while a coarse face needs more primer to reach an even colour. A sealed or a coated panel gives the best start for outdoor paint.
An exterior-bonded panel is the base requirement for any display that stays out. Even then, the cut edges need sealing, because the exposed layers are where water enters and swells the panel.
Seal every edge with paint, an exterior sealer, or an edge band before the display goes up. A sealed edge resists the wicking that lifts the veneer and ruins the art from the outline inward.
Design starts with a simple, readable outline. A bold shape reads from across the yard, while fine detail disappears at a distance, so the maker draws the big forms first and adds detail sparingly. A single strong silhouette usually beats a busy drawing for a display meant to be seen from the street, and a simple shape also cuts and paints faster.
A template transfers the design to the panel. A paper pattern, a projector, or a grid method scales the drawing to the finished size, and the outline marks onto the panel with a pencil or chalk.
Plan the mounting and the support at the design stage. A large cutout needs a stake, a frame, or a backing that holds it upright, so the mount is part of the drawing, not an afterthought once the piece is cut.
A grid method scales any small drawing to a large panel by copying square by square. A projector throws the image onto the sheet for a fast trace, and a printed template tiles together for a repeatable design.
Mark the outline on the best face and keep the lines light, so they paint over without showing. A clear outline guides the cut and keeps the shape true to the design.
Cut the outline with a jigsaw and a fine-tooth blade to reduce tearout on the veneer. Support the panel on both sides of the cut, and take the curves at a steady speed so the blade follows the line cleanly.
Sand the cut edges to remove the fuzz and to soften the sharp corners. A sanded edge takes the sealer and the paint far better than a raw, splintered one, and it removes the fuzz that would otherwise show through a thin coat.
For a layered scene, cut each piece, seal it, and stack the layers with the largest at the back. A small spacer or a glued block between the layers gives the depth that makes the scene read from a distance.
A fine-tooth blade, a slow feed, and a backing board keep the veneer from chipping at the outline. Cutting on the back face where the design allows also hides any tearout on the face that shows.
Drill the inside corners before the jigsaw reaches them, so the blade turns in a drilled hole rather than tearing the point of a tight corner.
Sealing comes before painting, and it covers every face and every edge. A primer and an exterior paint or a marine varnish block the moisture that would swell the panel and lift the finish.
Paint in thin coats, letting each one dry, so the colour builds evenly and the outline stays crisp. A stencil or a steady hand keeps the letters and the details sharp against the background.
Mount the finished piece on a stake, a frame, or a wall with the fixings sealed against water. A sealed fixing point and a piece that drains freely keep the display sound through the wet season.
An exterior acrylic or an oil-based paint suits most yard art, and a marine varnish suits a piece that keeps a natural timber look. A clear top coat over the paint adds a layer of weather protection.
Recoating each year renews the protection before the weather breaks it down. A fresh coat on a sound piece costs little and keeps the colours bright and the panel dry.
Yard art faces sun, rain, and wind, so the maker plans the exposure. A piece in full sun fades faster, a piece in a wet corner swells sooner, and a tall piece catches the wind, so the location and the mounting matter.
Store the off-season pieces flat and dry, and never leave them lying on damp ground. A dry, covered store keeps the panel sound until the next season.
Repair a damaged piece early. Sand the crack, seal it, and repaint the area before water works deeper into the panel, because a small repair now avoids a rebuild later.
A piece that has swollen or delaminated at the edge is best replaced, because a repair rarely holds on a soft panel. A piece that is still sound simply needs a clean and a fresh coat.
Check the art at the start and the end of each season. Catching the wear early keeps the display looking good and extends the panel’s outdoor life.
The panel sets how the art survives the weather. Film Faced Plywood brings a moisture-resistant face that suits a lasting outdoor piece, while Commercial Plywood serves a painted cutout or a sign. Melamine Plywood gives a smooth face for a stencilled sign, MDF Board machines a clean edge for an indoor or a covered display, and Chip Board covers the budget tier for a short-season piece.
Suppliers such as HYY list the bond class and the thickness on the contract, so the maker can order a panel that holds the paint and stays sound through the seasons.
What plywood is best for yard art? An exterior or moisture-resistant grade with sealed edges is the safe choice for a display that stays outdoors.
Can plywood be used outdoors for decorations? Yes, if the panel has an exterior bond and every edge and face is sealed and painted before it goes out.
How do you waterproof plywood yard art? Primer and exterior paint on all faces, a sealer on every edge, and a clear top coat keep the panel dry through the weather.
What thickness of plywood is good for yard art? A thinner panel suits a small cutout, and a thicker panel or a braced back suits a large freestanding figure.
How do you stop plywood yard art from rotting? Use an exterior grade, seal the cut edges, mount it so it drains, and store it dry off-season to stop the water that starts rot.